Wednesday, 31 December 2014

Mixed Media Canvas

 
 This year I have been very fortunate to attend a couple of workshops with very talented artists.
I'm lucky to know many gifted crafters/friends who I love to meet up with as often as possible.
 
This canvas was made after a workshop with Finnabair and features my beautiful daughter.
I thoroughly enjoyed making it and applying the techniques I'd
learned at the workshop. Finn is such a great teacher and so generous, sharing her knowledge.
 
 
 My husband and daughter quite liked it at this stage.
 
 
They were horrified when I covered it all in Heavy Black Gesso.


 Fortunately I had a plan of where I was taking it.
 
 
I love the effects that the Silks paint have on black.
 
Thanks for visiting
Debbie
 

Tuesday, 30 December 2014

Brightly coloured Tags


The next four tags are bright with colours and the backgrounds were great fun to make.
I started by applying the inks on each tag. The flower tag was stamped on and the for the
Julie Nutting Doll tag I used a stencil and lifted some of the ink off the tag using a baby wipe.
I love to paper piece the dolls clothes and my niece loves to come over and play with the dolls I have.


The seventh page isn't easy to see, I coloured the background with distress inks and then spritzed with water. The solid butterflies were stamped with white paint and them kiss stamped with a musical note stamp in black ink.
The Lady in Hat is coloured with pens and she's on a background of distress paints that were blended with spritzed water. For the daisies I stamped them onto self adhesive paper and coloured with pens. I love the face of the Lady in Hat, she's so pretty.


This is the last tag in the book that I've mad so far. I will add to it during 2015


Thanks for visiting
Debbie


Monday, 29 December 2014

Tag book of colouring fun

As promised here are the photos of the tag book I have been adding to during the year.
These are very large tags that I cut myself back in January.  A few of them I coloured straight away and a couple when I had a stamp in front of me that I wanted to use.

 
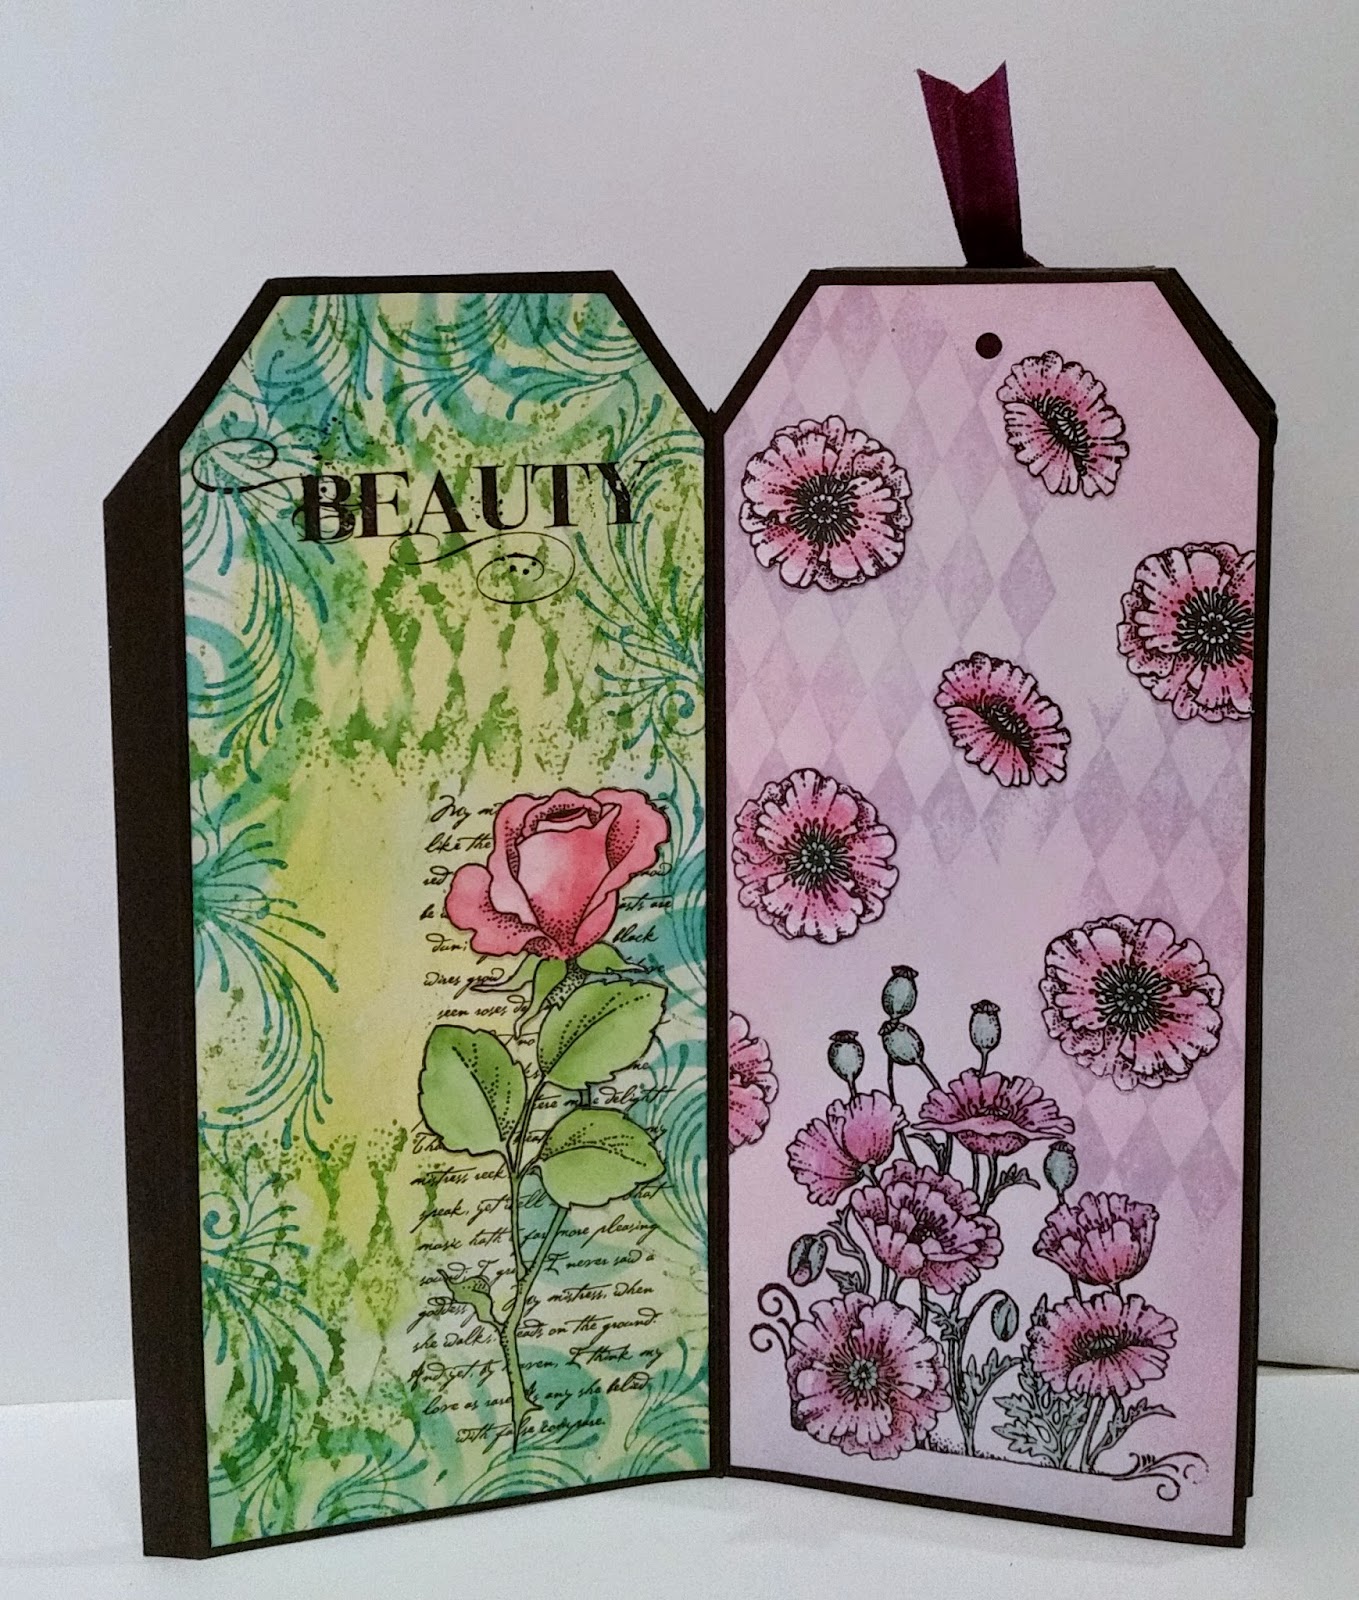
The tag on the left was made when I was invited to play with friends during the Summer and it tied in with a colour challenge that we had over at Chocolate Baroque. The pink tag was made using one of my favourite stamps the Remembrance Poppy I stamped it onto the tag then onto card and coloured and cut out the individual flowers.
 
 
These tags were made when I was visiting friends on one of our play dates. I love these Ladies they are so elegant and colour beautifully. For the background I seem to remember we did three colour pick. I find this a great start for my inspiration when making a project. Judith from the CB design team co-ordinates a colour challenge which is great to boost the mojo.
 
Tomorrow I'll add the next couple of pages
Debbie


Sunday, 28 December 2014

Goldfish Bowl

 
Hi, it's my intention that today I'll be able to have time to myself to ink up a
couple of new stamps and have some fun. I hope everyone has had a good Christmas.
 
I made this card for my husband whose birthday isn't until August but he loves his fish tank
and spends lots of time looking after the fish in it.
The fish were stamped onto card that had been coloured with spray inks then cut out and decoupaged.
The background is also coloured with sprays and stamped onto then I used pencils to colour the seaweed. For the shape I used dinner plates of two sizes. The cogs on the frame are from
 Steampunk Christmas heat embossed with  silver powder and distressed with black soot ink.


My second is a tag that's gone into a tag book which I've been adding to during this year, a few of my favourite Chocolate Baroque stamps.
 The tag is painted with two blues and white blending from the white to the darker blue.
I used bubble wrap to make the white dots on the tag.
 The Octopus is sitting on a shell from Underwater stamps.
I stamped the shell and the jelly fish from Steampunk Funky Fish onto white card
and coloured with alcohol pens.
I will post the other pages from my tag book on my blog over the next few days.


Thanks for visiting
 
Debbie
 

Tuesday, 16 December 2014

Zentangle Seahorses and F is for Fish


Good morning.
 I have been having great fun with these under the water themed stamps.
For my first card I started with a blank piece of card and stamped the seahorses then
drew the wavy lines around them with gel pens.
I zentangled with the pens filling in between the lines to resemble waves.
It took a few hours to fill the lines but was very therapeutic. When I stood back and looked at the card the Seahorses disappeared into the background so I drew around them with a charcoal pencil and smudged it.


For my next card I found in an old dictionary and took out the page with the words fish on.
I stamped with Black Versafine and clear embossing powder and coloured the fish with pencils, again thoroughly enjoying the time spent filling in the details.
I outlined the fish with the charcoal pencil so they stood out from the words.


Thank you for visiting
Debbie

Tuesday, 9 December 2014

Christmas card, ideal for batch making


I rarely remember to take photos when making cards so during the summer when I made my Christmas cards had my mobile phone next to me and snapped away to remind me how to stamp this card. These photos show how I make a wreath from a single branch.


Stamp the branch on the four sides first.
 
 
Place the second branch in the spaces and second stamp to add depth.


By filling in the gaps the wreath is completed.


I added the Christmas sentiment with red ink and a bow. The edges were distressed and I matted onto red and fixed to a Kraft card square card.
 
 
This card is ideal for batch making and will be given out to my friends and neighbours this year.
 
Thanks for visiting
 
Debbie


Monday, 8 December 2014

Two Little Girls Canvas


Hi.
 
This is the canvas I made while at a Finnabair workshop earlier this year. The two girls are my sister and myself taken by a local photographer. I have many childhood photos mainly taken by my Mum and sent to my Dad who was in the Merchant Navy and spent many months at sea.


The canvas has many layers of white, black gesso and sprayed inks. The lace we used was gorgeous and I used it sparingly, I'm a bit tight with touchy feely things. Again, the embellishments helped to create the texture and detail on the canvas. This one takes pride of place in my craftroom. 

Thanks for visiting
Debbie

Sunday, 7 December 2014

Memory Page inspired by Finnabair

For quite some time I've admired the creative work of Finnabair and I have been fortunate to attend a couple of her workshops this year. She is so inspirational when teaching and her style is so achievable. The first workshop I did was a 12 x12 inch page and decorated it around a photograph of myself (taken many moons ago).

 
The hardest part of the page was finding a decent photograph to put onto it.
I loved all the metal charms that we used, there were so many to choose from fearing that I was overloading the page. I added some background stamping with my favourite stamps Tangled Fragments and Harlequin Fragments
 
Tomorrow I'll have a canvas that I made to show.
 
Thanks for visiting
Debbie

Saturday, 6 December 2014

An Under the Sea Canvas

 
I recently received a canvas as a gift from a friend and when the Steampunk Funk Fish and Sea world stamps arrived set to work immediately.
The canvas is 10cm by 30cm in size. I've recently fallen in love with working on canvas so it was great fun to play.


I started with stamping onto scraps of card that were coloured with Brusho inks and Distress spray colours. For the background I used gesso, stencils with paste, ink sprays, paints, cogs and watch faces found at a flee market. The fishes and ship wreck were attached and a leaf sprig for dimension.
 
Many thanks for visiting
Debbie 

Monday, 24 November 2014

Fruity Recipe Book by

 
 My post today has a few photographs as I wanted to show the inside of the
Recipe book I've made.
The front cover is made with A4 white card and I ran it through the embossing machine in an A4 embossing folder.
I cut the card to A5 size and coloured with Vintage Photo Distress ink, a few sprays of water and when dry rubbed a little gold polish. The label was stamped with black ink and embossed with clear powder. I water coloured with distress inks.


For the inside pages I use Microsoft Publisher, drawing lines leaving the top of the page blank to be able to stamp in the space.
The stamping of the fruit inside was done like the front panel.
The edges of the pages were distressed with the vintage photo.


There are ten pages in the book for a few of my favourite recipes that I hunt through my various books for. It will contain chutney, cake, jam and scone recipes.


I bound the book with my Bind it all so in the future can take it to pieces and add more pages.

 
Many thanks for stopping by
Debbie

Sunday, 16 November 2014

Autumn Leaves

 
Two cards from me today using the Autumn Edges stamps.
I was inspired by lovely long walks through the leaves with the dog.
The crunch of golden leaves under foot reminds me
of being a child jumping in piles of garden leaves.
 
For the first, I stamped with brown Archival ink and water coloured with
Distress inks. The horse chestnut and acorns had a little glossy accents on them
to give a shine.


The second card was made using the Foliage colour Big and Juicy ink pad.
I stamped the solid leaf border across the bottom. Next I inked up the other leaves and again water coloured them. I cut out the leaves and fixed them to the card with sticky pads.


Thanks for visiting
Debbie


Saturday, 25 October 2014

Moonlit Fairies

I hope it's a good weekend for all and the thought of an extra hours crafting can only be good,
( the clocks go back tonight).
 
 
I usually start with white card but for this one I wanted to create a feeling of a magical night scene.
I cut the black card to A5 size and stamped the branches around the edges
with Versamark ink and white embossing powder.
The leaves were coloured with H20s of various Autumnal colours and then the centre was cut out.
I stamped the mushrooms from Autumn Poppy stamps and again coloured with H2Os.
The moon was made by cutting a circle out of a piece of paper and I pressed Versamark ink through the template. Next, white mica powder was rubber over with a soft brush.
The Fairies were stamped onto a separate piece of white card and embossed
with WOW powders then cut out.
When the fairies were added to the back I attached the leaf frame to the front.


A Halloween card that combines a stamp from Autumn Poppy and the falling down building from Things that go Bump.
 
Thanks for stopping by
Debbie
 

Tuesday, 14 October 2014

Toadstool Fairy

 
My card is made using the Toadstools from Autumn Poppy
 and a Fairy from August Fairy.
 
 
I started with stamping the toadstools onto the card and also onto paper to use as  masks.
The toadstools were coloured with alcohol pens. I cut a mask for the moon and placed it high so that the sentiment could be stamped over it later and the masks were laid over the toadstools
I haven't used my soft brushes for a while so I applied the ink with them as I wanted a soft blue
although it's a darker blue ink.
A little more colour was added to the base of the toadstools to ground them.
The masks were removed and the fairy and wording was stamped with Onyx Black Versafine.
I like the Versafine as it gives a good coverage with solid stamps.
 
Thanks for visiting
Debbie

Saturday, 4 October 2014

A pair of Pumpkins


Hi, I hope the weekend is good for everyone.
The girls have been making some fabulous Halloween Samples
and her are two of my creations.
The first was made with a hand cut pumpkin shape and Rusty Hinge, Spiced Marmalade
 and Vintage Photo for shading.


I inked all of the inside of the template with the Spiced Marmalade then added a little Rusty Hinge.
The paper that I cut from the centre of the aperture I trimmed smaller and shaded with the Vintage Photo. I repeated a few more times and then stamped the Flying Ship with Black Versafine Ink.
 
 
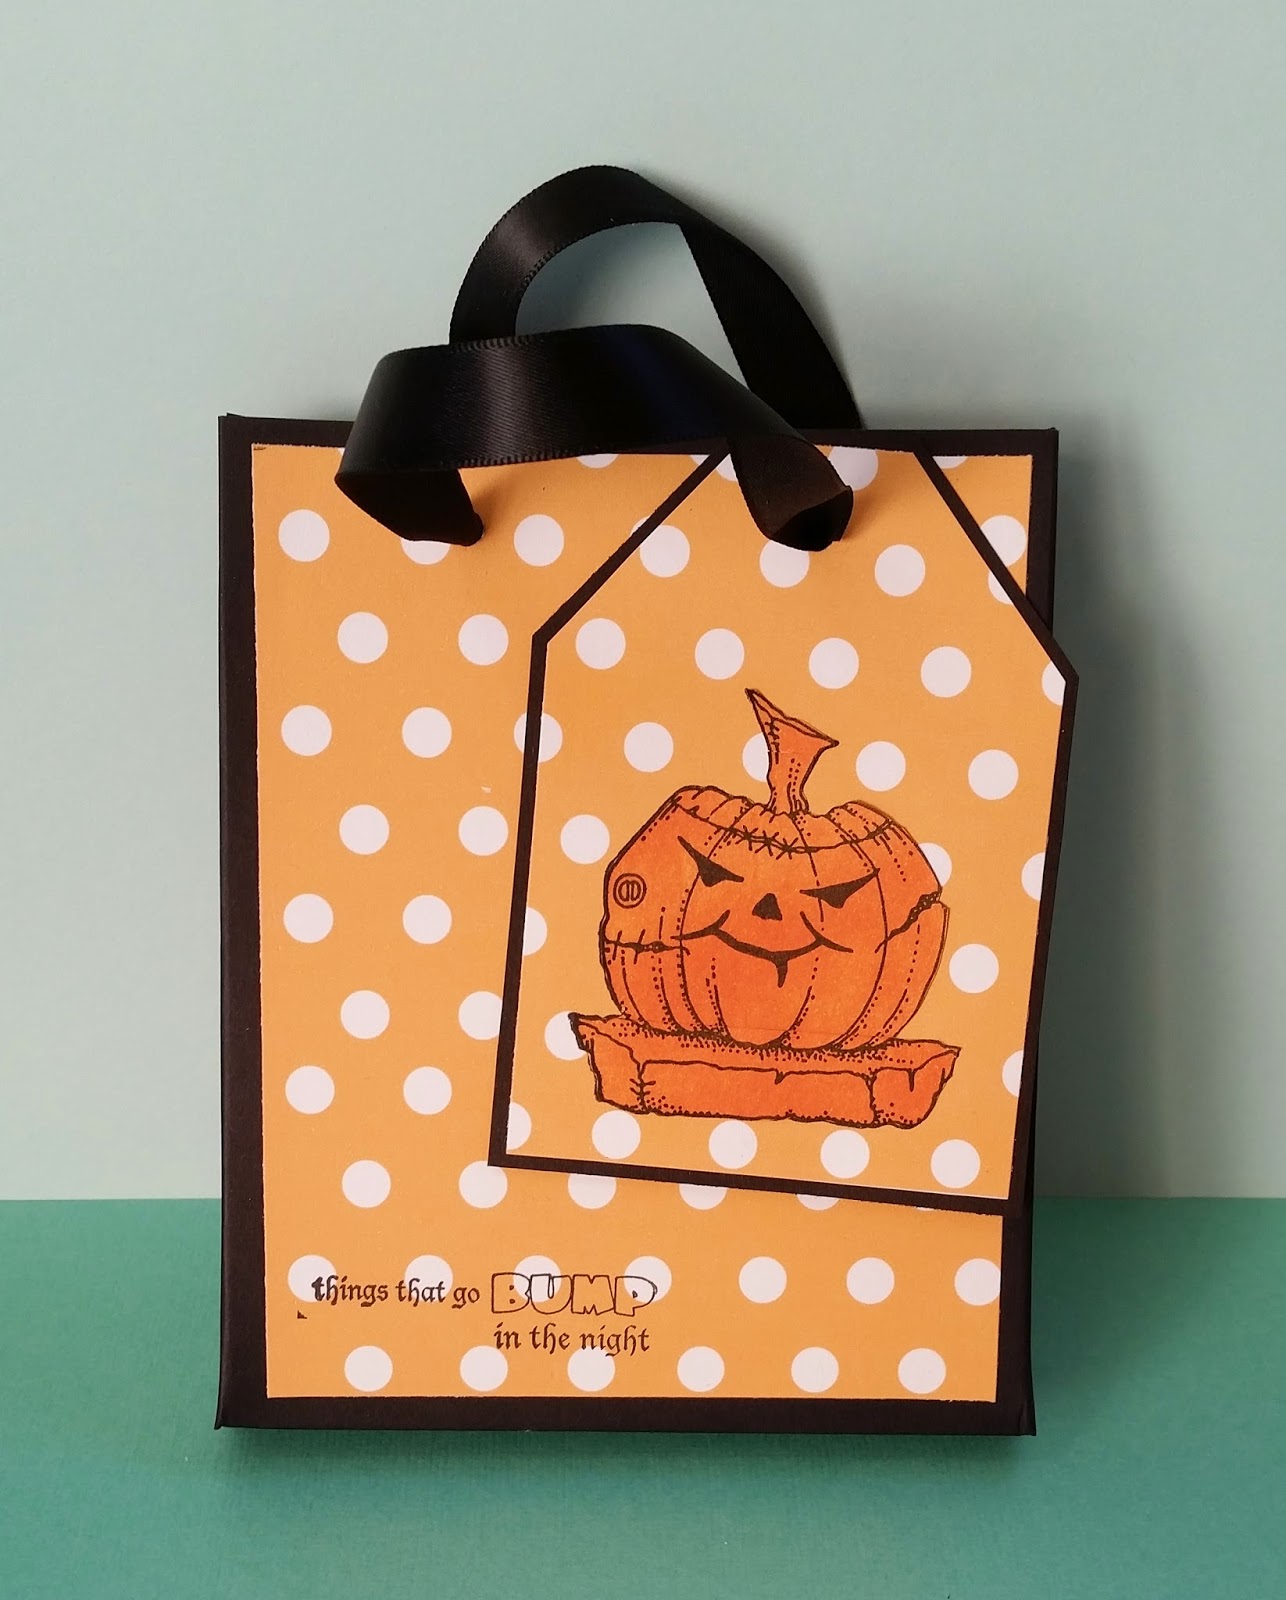
A little gift bag filled with treats made with a Printable Download called Polka Dotty.
 The download comes in a variety of colours and is a really handy paper.
The Pumpkin was stamped onto a sticky label that had been coloured before I stamped on to it.
The girls have many more fabulous samples to come so please stop by again.
 
Debbie

Tuesday, 23 September 2014

Christmas Magic


The weather are definitely changing and the leaves are rapidly turning from the
greens of Summer to the golden browns of Autumn.
 
I have a couple of cards to share using stamps from Holly Bells and Santa Baby.


I scored a square card, cut the squares with a craft knife to resemble windows and highlighted the scored lines with blue. 
I fixed acetate on to the back of the front that had Stickles dots .
 
  For the inside I stamped a selection of snowflakes for the background.
The mantle was stamped onto another piece of card and
coloured with Alcohol pens and the sentiment added to the corner.
Father Christmas was stamped onto a separate piece of card, coloured and
 I cut it out and fixed to the card.


This card also uses acetate in the aperture. I stamped the bells onto a scrap of acetate and when it was dry on the reverse used a quickie glue pen and each section added coloured glitters.
I attached with silicone glue as glitter is difficult to fix.
The holly was stamped, coloured and cut then added to the card. 


Thanks for visiting today
 
Debbie
 

Sunday, 14 September 2014

The odd one out

This card was a fun card to make, I love these penguins they are so cute.
 I stamped the Penguins and the Snowman
onto paper to use as masks.
I used Stormy Sky Distress Ink and torn paper to make the water as a ledge
 for the Penguins and Snowman to stand on.


Next I stamped the Snowman with Memento Black Ink and covered him with a mask.
Then stamped the penguins large and small covering each one after stamped.
 
A little Broken China was applied with a soft brush to colour the sky.
The noses and scarf was coloured with Alcohol pens and Clear Wink of Stella
 for a little bit of sparkle.
 
The girls have lots of amazing cards to show
so please pop back to see them.
 
Debbie

Friday, 5 September 2014

Baubles and Branches

 
I love the baubles from the Holly Bells and Santa Baby set as they are a great size for smaller cards for batch making for Christmas. 
 
I had stamped the baubles many times and cut them out ready to fix to the cards.
For the first one I stamped the leaf stamp from Thistle Butterfly with green ink
making a circle for the wreath. The baubles are attached with pads so they are raised.


For the second card I added a sentiment to the middle.
 
 
The holly branches are ideal for hanging the baubles, I distressed the edges with Vintage photos.

 
A similar card with a variation of the baubles.


Many thanks for visiting
Debbie

Tuesday, 26 August 2014

Turtle Dove Easel Fold Card


For the Christmas Season we probably send the most cards of the year so I'm always looking for ways to make cards that are as not going to cost a fortune in the post. An easel card is a great way to achieve dimension but to fold flat to go in an envelope.
 
 
I carefully stamped the pear tree from Turtle Doves with brown ink and
the star was inked with orange.
The tree was coloured with Coloursoft pencils.
 I trimmed and matted with red and cream to make a topper for the card.
 A strip of card was stamped with red Doves to make a border. I used a piece of A4 card, scored it in half and placed the topper on to see where I was to cut down from the centre fold to the next score lines. The sentiment from Christmas Magic Clear stamps was stamped onto cream, matted onto red and fixed to the inside fold. The border was attached then the tree topper and a couple of gems to finish.


The Honeysuckle is one of my favourite flowers
and couldn't resist colouring this one with oranges and the purples.
 
 
Many thanks for stopping by
Debbie

Saturday, 16 August 2014

Daisy Mobile Phone Cover

 
I've known for a few years that certain mobile phones you can get a picture put onto the cover.
It wasn't the case for my old phone so when I got my new one I got a clear cover.


I made a template from card and decorated it with the Daisy stamp from Honeysuckle Butterfly.
 
I also made a note card using the same method.
I started by colouring the centre of the card with Squeezed Lemonade and the edges with Mustard Seed. The diamonds are from the Harlequin Fragments and I used Mustard Seed Ink. The flower was stamped with Versafine Onyx Black and I lifted the yellow from the petals with a water brush.
For the leaves I used Coloursoft pencils.


Thanks for stopping by
Debbie

Friday, 15 August 2014

Here come the Girls


I have been playing again with the Julie Nutting Doll Stamps again.
It's been relaxing sitting and cutting out paper piecing while watching the
weather changing from summer to autumn within and hour and then back again.
The paper for the background of this card is a Printable download Polka Dotty 6 x 6 that comes in a variety of colours. Riley is quite tall and fits the A5 card.


Priscilla is quite a sassy young lady and I love to give her paper pieced stockings.
My niece loves her and earlier in the year used her for a canvas she made.
 
 
Many thanks for popping by
 
Debbie

Thursday, 14 August 2014

Baby wipe Technique

A few weeks ago I did a workshop with a lovely lady who has a company called Uniko Studio.
It isn't often that I get to craft with others and it was a pleasure as it was a small group and I was made to feel very welcome joining them.
We had five cards to make using the baby wipe technique and it was real inky fun
Here are a few of the cards we made.
 
 
I love the clean and simple style of these cards.
 
 
The ink from a couple of re-inkers was dripped onto a baby wipe ( different wipes give differing results). Place the stamp onto the wipe and then onto the card.


I used paper masks to give areas to work within.
The baby wipe technique is definitely worth remembering especially when multicolour ink pads dry our or a specific colour combination is wanted.


Many thanks for stopping by
Debbie

Wednesday, 13 August 2014

Stamp Storage


Storage is always a concern for crafters and since we re-organised my room I still find myself frustrated sorting though to find things.
I wanted a somewhere to put my growing collection of Julie Nutting stamps so reached for a few pieces of grey board and made a box.


I painted the grey board with a blue paint and them gently rubbed over with peach on a sponge to give a weathered look. When dry I used Golden Molding Paste through my newly acquired
Finnabair Honeycomb stencil. (I love the size of the holes in it.)

 
I rubbed the dots with silver Treasure Gold to blend with the blue.

 
The panels had been painted with the peach paint and the stencilled and two of them I stamped and coloured with pencils.

 
I think I may need to make a few more of these to save time when I'm searching for my crafty stash.
 
Thanks for visiting
Debbie